Here's a picture of 4 of them, one done (but a prototype), the others in process.

I'm experimenting with a variety of techniques on these. I cut out the disk shape, then impressed the celtic knot motif by pressing a metal pendant I have into the clay. (It doesn't show up well in these pictures, it's the ring in the center). The pendant also has a center design, but I didn't want that on these pieces, so after impressing it in the clay, I smoothed out the center section again. Then I brushed gold mica powder over the celtic knotwork.
Then Greg looked up a Gaelic translation of certain phrases having to do with each award (I can't now remember the translation) and I painted those on each medallion (after these pictures were taken ... obviously). I didn't have a paint brush small enough for the fine work, so I used the end of a larger sized tapestry needle.
On the back I used another technique. Using my ink jet printer and some T-shirt iron-on transfer paper, I printed the name of the event and the date. Then I cut out the iron-on transfer into a circle the size of the medallion, placed it on a tile (just glazed wall tiles I use for baking some clay pieces), and coated it with Translucent Liquid Sculpey. Then I baked it for 30 minutes . When cool, the paper peels off and leaves just a thin translucent rubbery piece with the print on it, almost like a decal. Then I glued that to the back of the medallion. I forgot to take a picture of that, but I will next time ... it's a very cool technique. You can use it for pictures too.
I outlined the weapons with small rolls of clay (produced by way of an extruder, as I'd never be able to roll them that thin, evenly). On the one that's done, I placed a sliver of silver clay under the sword blade. I did the same on the music notes (but with beige clay) but not with the throwing axe or arrow.
This was to act as background for another technique I'm experimenting with: resin. I saw this in a magazine and have been wanting to try it, using tinted resin to create a sort of enameled look.
After looking at what was available at the local store (not much), I chose Easy Cast.

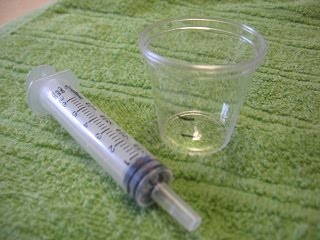
It comes with two bottles which you have to mix together in equal portions ... but it comes with no measuring cups. So I improvised.
I bought a package of 50 disposable 'shot glasses' at the local liquor store for a few bucks. Then I used a syringe I had on hand (for measuring and dispensing some liquid medicine Tyler was on a few months ago) to place a certain amount of water into one of the cups, and marked a line where the water came to with a Sharpie. I then added the same amount of water again, and marked the second line. Then I had two equal measurement marks for pouring in the resin mixes.
For the medallion with the sword, I mixed up the resin and tinted it purple. I forgot to take a close-up picture of that. It's not quite the 'enameled' look I was going for, though, but it still looks interesting.
I'll be using the tinted resin in the other pieces, in the point of the arrow, the handle and axe head of the axe, and the (beige-backed) music notes. Not all purple, I'll experiment with different colors. The resin didn't come with tint, but the store separately sold a package of three resin dyes, yellow, blue and red. With those I can mix a few different tints.
The Easy Cast worked well. It was incredibly easy to mix, and to tint. When I was first done mixing, it was full of tiny bubbles - something I heard can be a problem in resin casting. But I filled in the outlined sword blade with it, and noticed far fewer bubbles once it was in place. And the few that were there disappeared over the next 15 or 20 minutes as it began to set. I also noticed that what was left in the mixing cup initially was fully of miniature bubbles, but as it set, they too disappeared. The instructions say that it is designed to "de-bubble itself" (they used a more 'formal' term, I can't remember it) as it sets up, and apparently it's true.
I mentioned the finished medallion is only a prototype ... it was initially my experimental piece, but as it was turning out well, I'd hoped to just use it as a final piece. But tonight I noticed a typo in the printed words on the back. It doesn't quite match the others in size anyway, and now that I've got the techniques done, it won't take long to make one more.
To finish the others, I need to print the backing piece (after correcting the typo) and attach that; create the frame and hanging loop and attach that; and then just enamel the center piece, coat the rest with glaze (to protect the paint), and ... that's about it.
I have some other projects I'd like to try using the resin technique for, after these medallions are finished.
No comments:
Post a Comment