After an initial interest, I quickly grew sick to death of Charlie Sheen. But this ... this is funny.
Thursday, April 21, 2011
Sunday, April 17, 2011
Venturing Into Making Things
It's been awhile since I had any interest in making anything. But something's come up. Greg's hosting a non-SCA event in a few weekends (it's a get-together for friends in our pirate group, but not an 'official' SCA event). There are going to be some friendly competitions, and he wanted splashy award medallions for the champions in each competition. We were going to try casting them in pewter, but then the idea came up to try making them out of clay.
Here's a picture of 4 of them, one done (but a prototype), the others in process.

I'm experimenting with a variety of techniques on these. I cut out the disk shape, then impressed the celtic knot motif by pressing a metal pendant I have into the clay. (It doesn't show up well in these pictures, it's the ring in the center). The pendant also has a center design, but I didn't want that on these pieces, so after impressing it in the clay, I smoothed out the center section again. Then I brushed gold mica powder over the celtic knotwork.
Then Greg looked up a Gaelic translation of certain phrases having to do with each award (I can't now remember the translation) and I painted those on each medallion (after these pictures were taken ... obviously). I didn't have a paint brush small enough for the fine work, so I used the end of a larger sized tapestry needle.
On the back I used another technique. Using my ink jet printer and some T-shirt iron-on transfer paper, I printed the name of the event and the date. Then I cut out the iron-on transfer into a circle the size of the medallion, placed it on a tile (just glazed wall tiles I use for baking some clay pieces), and coated it with Translucent Liquid Sculpey. Then I baked it for 30 minutes . When cool, the paper peels off and leaves just a thin translucent rubbery piece with the print on it, almost like a decal. Then I glued that to the back of the medallion. I forgot to take a picture of that, but I will next time ... it's a very cool technique. You can use it for pictures too.
I outlined the weapons with small rolls of clay (produced by way of an extruder, as I'd never be able to roll them that thin, evenly). On the one that's done, I placed a sliver of silver clay under the sword blade. I did the same on the music notes (but with beige clay) but not with the throwing axe or arrow.
This was to act as background for another technique I'm experimenting with: resin. I saw this in a magazine and have been wanting to try it, using tinted resin to create a sort of enameled look.
After looking at what was available at the local store (not much), I chose Easy Cast.

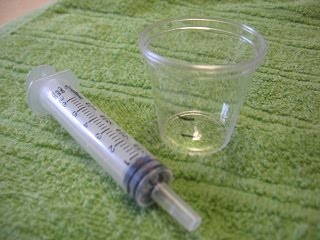
It comes with two bottles which you have to mix together in equal portions ... but it comes with no measuring cups. So I improvised.
I bought a package of 50 disposable 'shot glasses' at the local liquor store for a few bucks. Then I used a syringe I had on hand (for measuring and dispensing some liquid medicine Tyler was on a few months ago) to place a certain amount of water into one of the cups, and marked a line where the water came to with a Sharpie. I then added the same amount of water again, and marked the second line. Then I had two equal measurement marks for pouring in the resin mixes.

For the medallion with the sword, I mixed up the resin and tinted it purple. I forgot to take a close-up picture of that. It's not quite the 'enameled' look I was going for, though, but it still looks interesting.
I'll be using the tinted resin in the other pieces, in the point of the arrow, the handle and axe head of the axe, and the (beige-backed) music notes. Not all purple, I'll experiment with different colors. The resin didn't come with tint, but the store separately sold a package of three resin dyes, yellow, blue and red. With those I can mix a few different tints.
The Easy Cast worked well. It was incredibly easy to mix, and to tint. When I was first done mixing, it was full of tiny bubbles - something I heard can be a problem in resin casting. But I filled in the outlined sword blade with it, and noticed far fewer bubbles once it was in place. And the few that were there disappeared over the next 15 or 20 minutes as it began to set. I also noticed that what was left in the mixing cup initially was fully of miniature bubbles, but as it set, they too disappeared. The instructions say that it is designed to "de-bubble itself" (they used a more 'formal' term, I can't remember it) as it sets up, and apparently it's true.
I mentioned the finished medallion is only a prototype ... it was initially my experimental piece, but as it was turning out well, I'd hoped to just use it as a final piece. But tonight I noticed a typo in the printed words on the back. It doesn't quite match the others in size anyway, and now that I've got the techniques done, it won't take long to make one more.
To finish the others, I need to print the backing piece (after correcting the typo) and attach that; create the frame and hanging loop and attach that; and then just enamel the center piece, coat the rest with glaze (to protect the paint), and ... that's about it.
I have some other projects I'd like to try using the resin technique for, after these medallions are finished.
Here's a picture of 4 of them, one done (but a prototype), the others in process.

I'm experimenting with a variety of techniques on these. I cut out the disk shape, then impressed the celtic knot motif by pressing a metal pendant I have into the clay. (It doesn't show up well in these pictures, it's the ring in the center). The pendant also has a center design, but I didn't want that on these pieces, so after impressing it in the clay, I smoothed out the center section again. Then I brushed gold mica powder over the celtic knotwork.
Then Greg looked up a Gaelic translation of certain phrases having to do with each award (I can't now remember the translation) and I painted those on each medallion (after these pictures were taken ... obviously). I didn't have a paint brush small enough for the fine work, so I used the end of a larger sized tapestry needle.
On the back I used another technique. Using my ink jet printer and some T-shirt iron-on transfer paper, I printed the name of the event and the date. Then I cut out the iron-on transfer into a circle the size of the medallion, placed it on a tile (just glazed wall tiles I use for baking some clay pieces), and coated it with Translucent Liquid Sculpey. Then I baked it for 30 minutes . When cool, the paper peels off and leaves just a thin translucent rubbery piece with the print on it, almost like a decal. Then I glued that to the back of the medallion. I forgot to take a picture of that, but I will next time ... it's a very cool technique. You can use it for pictures too.
I outlined the weapons with small rolls of clay (produced by way of an extruder, as I'd never be able to roll them that thin, evenly). On the one that's done, I placed a sliver of silver clay under the sword blade. I did the same on the music notes (but with beige clay) but not with the throwing axe or arrow.
This was to act as background for another technique I'm experimenting with: resin. I saw this in a magazine and have been wanting to try it, using tinted resin to create a sort of enameled look.
After looking at what was available at the local store (not much), I chose Easy Cast.

It comes with two bottles which you have to mix together in equal portions ... but it comes with no measuring cups. So I improvised.
I bought a package of 50 disposable 'shot glasses' at the local liquor store for a few bucks. Then I used a syringe I had on hand (for measuring and dispensing some liquid medicine Tyler was on a few months ago) to place a certain amount of water into one of the cups, and marked a line where the water came to with a Sharpie. I then added the same amount of water again, and marked the second line. Then I had two equal measurement marks for pouring in the resin mixes.
For the medallion with the sword, I mixed up the resin and tinted it purple. I forgot to take a close-up picture of that. It's not quite the 'enameled' look I was going for, though, but it still looks interesting.
I'll be using the tinted resin in the other pieces, in the point of the arrow, the handle and axe head of the axe, and the (beige-backed) music notes. Not all purple, I'll experiment with different colors. The resin didn't come with tint, but the store separately sold a package of three resin dyes, yellow, blue and red. With those I can mix a few different tints.
The Easy Cast worked well. It was incredibly easy to mix, and to tint. When I was first done mixing, it was full of tiny bubbles - something I heard can be a problem in resin casting. But I filled in the outlined sword blade with it, and noticed far fewer bubbles once it was in place. And the few that were there disappeared over the next 15 or 20 minutes as it began to set. I also noticed that what was left in the mixing cup initially was fully of miniature bubbles, but as it set, they too disappeared. The instructions say that it is designed to "de-bubble itself" (they used a more 'formal' term, I can't remember it) as it sets up, and apparently it's true.
I mentioned the finished medallion is only a prototype ... it was initially my experimental piece, but as it was turning out well, I'd hoped to just use it as a final piece. But tonight I noticed a typo in the printed words on the back. It doesn't quite match the others in size anyway, and now that I've got the techniques done, it won't take long to make one more.
To finish the others, I need to print the backing piece (after correcting the typo) and attach that; create the frame and hanging loop and attach that; and then just enamel the center piece, coat the rest with glaze (to protect the paint), and ... that's about it.
I have some other projects I'd like to try using the resin technique for, after these medallions are finished.
Monday, April 11, 2011
A Tease Of Spring
Yesterday it was 80 degrees here ... a welcome hint of spring. I spent several hours outside doing garden work.
Last year I felt like I hadn't gotten anything done, as the areas I worked on really didn't look like much throughout the summer. But yesterday, when I began cleaning those areas up and getting them ready to plant, I was able to see just how much I did get accomplished last year in prepping these areas for future use, because it's all starting to come together exactly as I hoped. This year I didn't have to do a ton of work to ready them - just rake out some dead leaves, and lay out some soaker hose. So when the plants are available, I'm ready to go get them and plant.
I did have to fix the one (store-bought) rain barrel but that was because it was bought late last year and never really fixed then. I bought the one decorative rain barrel because it was in a more visible location, and I wanted that one to look nice. But it's a bad design, where the hose running from the barrel to the downspout has to be exactly level to work. When I set it up last year I didn't get it exactly level, so what happened was that the water would run in to the barrel, but it wouldn't drain back into the downspout when it was full; so the first time it got full, it overflowed around the lid, flooding the flower bed. I unhooked it and never used it the rest of the year.
Yesterday I finally leveled it completely, so now it ought to work fine throughout the season. I also laid out the soaker hose in that bed, staking it down with little tent stake like things that actually came with our Christmas yard decorations to hold them in place.

The section in the back (behind the scraggly looking azaleas) is still not staked because I don't know exactly what I'm planting back there yet, so I needed to leave it until stuff's planted. Then I can loop the hose around the base of the plants and stake it down. I may mulch as well, which will help bury / cover up the soaker hose, though it doesn't really matter - once the plants get thick and lush they will mostly hide it.
I have to split that hose in two at one point and put an on/off valve in it. In this flower bed, the stuff from the azaleas forward will get rain when it does rain. But I plan to plant things behind the azaleas, and those things will be completely under the awning, and never get any rain. So they will need watered more often, even if we're getting good rain they will need watered. But I can't just turn on the soaker hose and water the whole bed if there's been plenty of rain or I'll wash out the front. So I'm going to divide the hose and put an on/off valve in at the awning line. Then I can shut off the bottom half of the hose and only water the back of the bed when necessary, or open the valve and water the whole bed if we haven't had enough rain.
My other project is a little more involved. I want two more rain barrels for the other area. I had one last year, and we used it, but it would get used up too fast - one good deep watering of that flower bed and it would be empty. Then if it didn't rain for awhile, it wasn't getting refilled. Of course, it was taking so much water because that planting bed is entirely under the awning, so got no rain at all, and needed more frequent deep watering. I'm thinking about doing away with that this year, but more on that in a minute.
But the rain barrel did work so well that during even one good rain it would fill up completely, long before it stopped raining, letting the rest of the precious rainwater go down the drain - so I knew that adding two more, they would also be easily filled during any good rains, giving me 3 times as much backup water before worrying about it raining again.
But I've been to the place where we got this one several times, and they are out of these barrels, and don't know when they'll get them in. I'd like two of these because they're only $15 a piece (whereas I paid about $100 for the 'fancy' one).
One big thing I accomplished yesterday was removing a shrub that was right in front of last year's rain barrel. It was really seriously in the way for adding any more rain barrels over there, but I had balked about taking it out last year because I thought I was going to have to kill it - that's how I had to get the others out that I removed, cutting off all their branches first to leave just the stump, then digging and dragging that out of the ground. I really hated to kill any more shrubs. In a brief burst of energy yesterday, I tackled that shrub, and managed to dig it out. So I moved it around to the side of the house. Greg had to help me replant it, as I couldn't get the hole dug out quite deep enough. But that's a huge relief, not having that shrub in the way. Later this spring I'll remove the other one, and that whole area will finally be ready to finish.

The plans for that corner are to add two more rain barrels, but there's some work that needs done there first. We get a lot of rain overrunning from the roof in that corner, and I want to grade that corner better, piling up dirt higher against the foundation and sloping it away from the house. Once I do that, I have to figure out a way to get three rain barrels into that corner, level ... some kind of little leveled platforms stuck into the grade mound, I'm thinking. Those 3 barrels are going to take up a huge portion of that corner, and with the difficulty keeping that area watered since it's under the awning, I'm thinking about not trying to turn this into such a flower bed after all, and use it as more of a utility area. I already have a few things planted there from last year (some of which are starting to come up) - a fern, a bleeding heart, and a couple hostas - which I may be moving them somewhere else.
Anyway - it was good to be out in the gardens yesterday. I'm extremely bummed that after today the temperature's supposed to drop again for some time. I'm really ready for it to get warm and stay warm.
Sunday, April 10, 2011
Sigh.
There's no good segue from that last post, but I guess I have to do something, to keep posting here.
It's been rough. I've been mostly keeping it to myself, outwardly managing what appears to be a normal existence. Mostly I've been doing a whole lot of distracting myself. But more on that another time.
Today is supposed to be the warmest day of the year so far, in the high 70s. I'm waiting for it, as it was cold when I woke up, and I've been chilled ever since. We're supposed to clean out the garage today. Yay. But it needs done.
Well, that's enough for now.
Subscribe to:
Posts (Atom)